
Hunting Gear
DIY Moose Hunting | The North American Adventure

Are You Ready to Tackle DIY Moose Hunting?
If you enjoy spending time outdoors, there’s no shortage of adventures you can pursue in North America. From backpacking to rock climbing to hunting, there is something that will always intrigue us, challenge us, and push us to new heights. DIY moose hunting has to rank near the top of one or all of those lists. It combines backpacking/hiking in very remote areas, wilderness survival skills, battling the harsh elements, and going toe-to-toe with the world’s largest member of the deer family. If you like the idea of planning a DIY hunt for yourself and maybe a hunting buddy, here’s a rundown of how a DIY moose hunt could go.

Moose Biology
Moose are some of the most interesting and formidable-looking animals we have in North America. They also range across northern Europe and Asia, but this article focuses on the North American population that occurs in the northern U.S., Alaska, and Canada. Moose tend to inhabit remote areas that are nightmares for humans to travel through, including marshes, bogs, mucky river beds, dense regrowth, recently burnt forests, and thick alders, willows, or aspen. How they manage to move through such areas with such impressive headgear is a mystery.
As mentioned above, they are the world’s largest member of the deer family, which includes caribou, elk, and the various deer species. Except for the bison, they are also North America’s largest land mammal. Additionally, of all the moose subspecies in the world, the Alaska-Yukon subspecies is biggest and can weigh up to 1,600 pounds and stand 6 feet tall. Other subspecies in North America include the Eastern moose (Eastern Canada and New England area), Shiras moose (Rocky Mountains), and the Northwestern moose (stretching from the Great Lakes states through Canada to Alaska). Moose are browsers through most of the year, which means they primarily eat the tender new growth of willows, birch, aspen, and many other tree or shrub species. But during the spring and summer, they will also graze on forbs, aquatic vegetation in shallow water, and leaves.
Where to Hunt Moose
Since moose occur across the northern U.S. states, Alaska, and Canada, you have a range of excellent DIY moose hunting opportunities. Most people dream about Alaska moose hunts, because it’s a wild and rugged state and even non-residents can easily register for many hunting units. The Alaska moose hunting license price is manageable (if not slightly high), although the travel there is what can cost a lot more. While you could truly do unguided moose hunting in Alaska, your odds are not great. You’d be competing with many other hunters and wouldn’t have any local knowledge to know where to go. A better option for what could possibly be a once-in-a-lifetime opportunity might be to use a plane or guide service to fly you into better hunting areas. These areas are more remote, don’t have as much pressure from other hunters, and they also offer more moose and potentially trophy animals. By doing one of these Alaska moose hunting drop camps, you are still hunting on your own – it’s just like taking a flying taxi to get there. That’s what we did last year, and as you can tell from the picture above, it worked out well!
However, there are also opportunities for more affordable moose hunting trips in the lower 48 if you are patient. Maine offers very good hunting opportunities for the Eastern subspecies, while Washington, Idaho, and Colorado have good habitat for the Shiras population. But it can be tough to draw tags in some states. For example, in the video below, Chris Nowak got a chance to bow hunt Shiras moose in Colorado a few years ago. It took him 14 years to draw this specific tag, so that might give you some context. If you plan on a moose hunting trip, especially in a highly coveted state or hunting unit, plan on applying for tags for at least a few years. Here’s how his adventure played out.
Essential Moose Hunting Gear
Depending on where you hunt and how you have to get there, your DIY moose hunting equipment will vary a bit. Obviously, there’s a fine line between not being prepared and having so much gear that it’s hard to get around. If you plan on getting some kind of air transport to a drop camp or remote area, be aware that bush pilots flying in smaller planes have to strictly limit the weight they can take. In most cases, they may only haul one hunter and about 100 pounds of gear at a time. That means you need to eliminate any unnecessary weight and gear. Here are the essential items you’ll need.
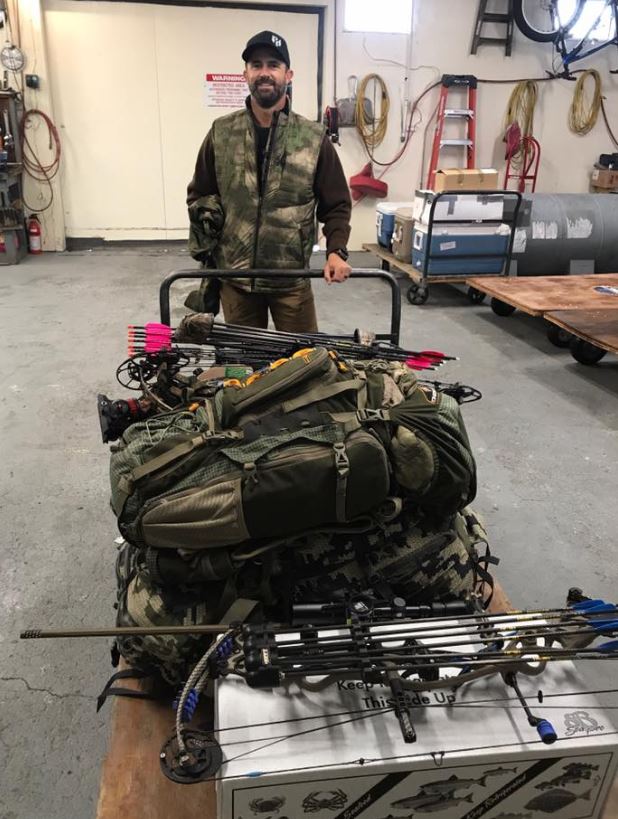
No matter where you hunt, you should be prepared for different weather and environmental conditions. During the early season, include performance base layers, thinner camo clothing, and even insect-treated clothing. When you’ve been dropped off by a plane in a remote area, it’s not the ideal time to realize you should have packed mosquito and fly-repellent gear. Further on into autumn, make sure to pack heavier layers and waterproof gear to stay warm and dry. A great pair of boots are essential for all the hiking you’ll be doing, and we recommend Thorogood® boots.
Depending on what tags you get and your own preference, you could bring a gun, bow, or both. I typically bring both my Hoyt® bow and Browning® rifle, with the intent of using my bow first. But on our Alaskan moose hunt, the bull winded me within 15 yards and came back out at 70 yards – if I hadn’t had my X-Bolt with, I may not have had another opportunity with the bow.
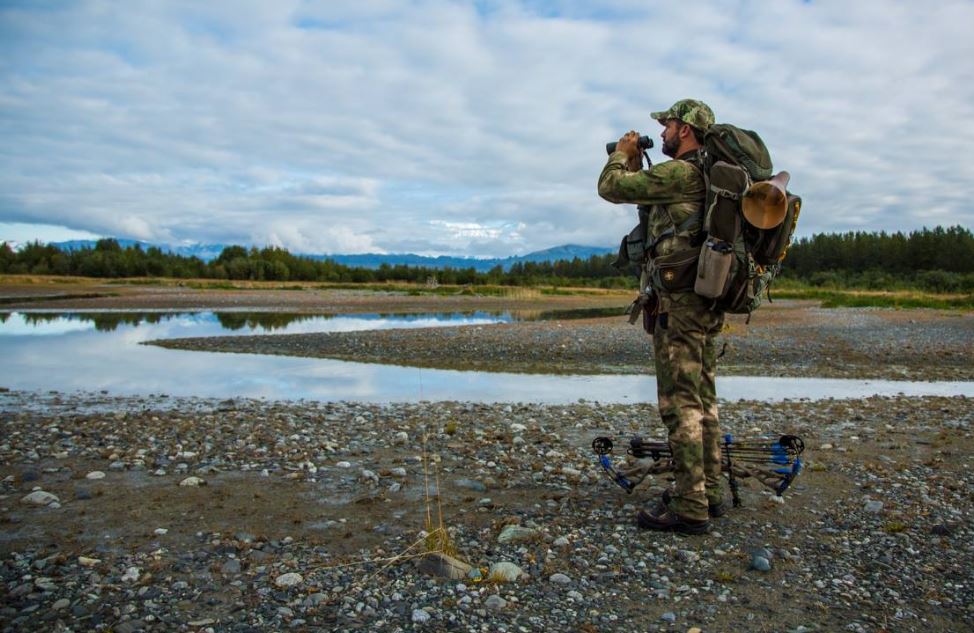
We’ll talk about how to hunt moose below, but a good strategy is to sit at a vantage point and glass for bulls. Vortex® spotting scopes and binoculars are top-of-the-line and we always bring them with. If you can connect with a bull moose, you will need a sharp and durable knife to skin and quarter it – the knives from Outdoor Edge® will get the job done, as you saw in the video with Chris above. Game bags will also help you protect the meat from insects, dirt, and debris.
Moose Hunting Tactics
Obviously, before you go DIY moose hunting, you should spend time researching a few areas, studying the hunting regulations, and learning how to hunt for them. The best tactic for each area is a little different. For example, Eastern moose primarily spend their time in the dense forests and bogs of New England, so doing a spot and stalk hunt would be a little impractical. Meanwhile, hunting the Shiras or Alaska-Yukon subspecies requires you to cover a lot of open country to find them.
But scouting for moose does take some effort no matter where you hunt. You’ll still need to put your boots to good use by walking miles each day, focusing on high quality moose habitat and looking for sign (e.g., tree rubs, broken branches 5 to 8 feet into the air, moose scat or tracks, etc.). If you find an area with lots of good sign (especially if it is fresh), use your spotting scope or binoculars to scan the woods or slopes around you. Look for large dark objects and bright antler paddles that stand out against the background. If you don’t see anything, you may want to stay still for a while and start a calling sequence. You can make cow moose calls using just your hands or fashion one out of some rolled-up birch bark. Give a few calls and then use a branch to rake the trees around you, which simulates a bull making a rub. A better tool to use is an old deer, elk, or moose shoulder blade bone (scapula), as it has the same general shape as a moose paddle and sounds similar. If you don’t get any response, it might be time to move on, following the sign as you go.
If one responds to your call, try to pinpoint the location and get in a concealed position where you can see them approach and make a shot. After calling, a bull may come in quickly or may take many, many hours to a day to come to the call. If you have the time, patience is key. If you spot a moose further away that won’t come to you, use whatever brush, trees, or hills available to approach without them seeing you. In Chris’ case, the moose were very used to seeing hikers and tourists in that area, so he was able to use that to his advantage by acting like one. Instead of trying to stay hidden (like a predator does), he openly and slowly approached the moose to within 17 yards to make a chip shot that dropped the moose within eyesight. If the moose where you’re hunting are skittish around humans, you’ll have to do everything you can to stay hidden until it’s too late for them to care anymore.
If you do connect with a bull moose on your DIY moose hunting trip, don’t pat yourself on the back too quickly because you’ve still got your work cut out for you. You will need to skin, quarter, and pack all the meat and antlers back to your camp, which is no easy undertaking considering a bull moose could weigh 1,600+ pounds on the hoof! Their hides are extremely tough and each quarter can weigh 150 pounds easily. Last, if the weather forecast is warm, you need to get the meat on ice or in a cooler as soon as possible. But if the temperatures are around or below freezing, you can take your time getting it back from the wilderness.
Time for DIY Moose Hunting
If DIY moose hunting sounds good to you, maybe it’s time you get serious about it. In most states, you’ll be able to apply for the next year’s moose hunting season by mid-winter. Remember that it might take you a while to get drawn for a tag, but you will also usually earn preference points each time you apply, making it more likely the next year. Keep after it and you’ll get out on your own moose hunting adventure soon.
Source link: https://www.purehunting.com/diy-moose-hunting-the-north-american-adventure/ by Pure Hunting at www.purehunting.com
Hunting
Capturing the Hunt: Using Trail Cameras for Turkey Hunts

In the excitement of a successful hunt, it’s easy to forget to capture the moment with a photo. This can be a missed opportunity, especially for someone who always carries camera gear on hunts. But there’s a simple and effective way to ensure you get those memorable shots: using trail cameras.
The Role of Trail Cameras

Trail cameras have become essential tools for many hunters, not just for scouting but also for capturing the action during the hunt. Setting up a trail camera can provide you with extra memories and a unique perspective on your hunt. If you already own a camera, it’s a cost-effective way to enhance your hunting experience.
Choosing and Setting Up Your Camera

Whether you’re using traditional cameras or cell cameras, most can be set up to function like a traditional trail camera. This means you don’t need to activate your data plan if you’re using cell cameras. The key is in selecting the right settings.
Camera Settings
- Video Duration: Opt for the longest video clip your camera offers. This ensures that even if a hen arrives before the longbeard, you’ll still capture the entire sequence.
- Recovery Time: Set this to the shortest possible duration. You want the camera ready to record a new clip immediately.
- Resolution: Choose the highest video quality available. This will provide the best footage, assuming you use a large-capacity SD card.
- Trigger Sensitivity: Adjust based on your environment. In a windy field, use the lowest sensitivity to avoid endless clips of moving vegetation. On calm days or in confined spaces, increase the sensitivity to ensure the camera captures all movement.
Positioning Your Camera

One common mistake is placing cameras too close to the decoys. Turkeys tend to focus on the jake decoy, so your camera placement should account for this. Positioning the camera 10 to 20 feet away from the decoys is often ideal. This distance allows you to capture the entire bird as it approaches, rather than just its feet.
Consider the Approach Path
- Anticipate Entry Points: Aim your camera in the direction you expect the turkeys to approach from. This ensures a better overall shot.
- Mind the Sun: Position the camera to avoid sun flares on the lens, which can disrupt your footage.
- Camouflage: While turkeys don’t seem to mind trail cameras, it’s wise to reduce the chances of reflection or glare. Pile up some debris around the camera to help it blend in with the environment.
Benefits of Trail Camera Footage

Using a trail camera is a straightforward way to capture high-resolution video of your hunt without investing in additional gear. This method allows you to focus on the hunt itself while the camera takes care of recording the action.
Practical Tips for Use
- Quick Setup: Setting up a trail camera is quick and easy. Even when running and gunning and changing spots frequently, it takes only seconds to set up the camera from your pack.
- Capture Every Moment: The effort pays off when you get high-quality footage of a strutter attacking your decoys. These videos provide lasting memories and a unique view of the hunt.
Incorporating trail cameras into your turkey hunts can enhance your experience and provide invaluable memories. By choosing the right settings, positioning the camera thoughtfully, and blending it into the environment, you can capture the excitement of the hunt without missing a beat. This approach not only adds an extra layer of enjoyment to your hunting trips but also ensures you have a visual record of those special moments.
Do you have any tips for trail cameras? Leave your thoughts in the comments below.
Archery
Can You Hunt Enough To Feed Your Family For YEARS?

As masters of the hunt, you understand the thrill and satisfaction of providing for your family through your skills in the wilderness. However, relying solely on hunting and trapping may not be enough to ensure your family’s well-being in times of crisis. The stark reality is that whatever you’re able to hunt may not be sufficient to feed yourselves and your loved ones. At Survival Cave Food, we recognize the importance of having a reliable backup supply to augment your hunting efforts and provide peace of mind during emergencies.


Hunting
Rangefinders: Advanced Techniques for Enhanced Hunting Success

The utility of rangefinders in hunting extends far beyond their fundamental purpose of determining accurate distances for shooting. While commonly associated with aiding marksmanship, rangefinders can be leveraged in innovative ways to optimize hunting strategies and increase efficiency in the field. For both novice and seasoned hunters alike, mastering advanced techniques with rangefinders can significantly enhance the overall hunting experience. In this comprehensive guide, we delve into two distinct but invaluable techniques for utilizing rangefinders to their fullest potential.
Strategic Stalking: Planning with Precision

One of the most profound realizations among hunters is the strategic value of rangefinders in planning stalks. Beyond mere navigation toward the prey, identifying optimal shooting positions can be a game-changer in hunting success.
Consider a scenario where a hunter spots a deer bedded downhill, with a prominent boulder positioned behind it. Traditional wisdom dictates estimating the distance to the deer and planning a route accordingly. However, the innovative use of a rangefinder elevates this approach to a new level of precision.
By ranging both the deer and the boulder, the hunter gains critical insight into the landscape’s geometry. Suppose the deer is determined to be 500 yards away, while the boulder registers at 547 yards. This data reveals that reaching the boulder would position the hunter approximately 47 yards from the deer. Armed with this knowledge, the hunter can strategize the approach, confident in the understanding of potential shooting distances.
Dynamic Distance Assessment: On-the-Move Tactics

In dynamic hunting scenarios where targets are mobile or their exact locations are uncertain, rangefinders emerge as indispensable tools for real-time distance assessment. Rather than relying on fixed objects for reference, hunters can adopt a proactive approach by utilizing rangefinders while on the move.
Imagine stalking a buck actively rutting in dense woodland. In such scenarios, maintaining situational awareness and adaptability are paramount. Here, the continuous use of a rangefinder proves invaluable.
Equipped with a rangefinder, the hunter can seamlessly integrate distance assessment into their movements. With each step, the hunter periodically scans the terrain ahead, utilizing the rangefinder to gauge distances to potential targets. This streamlined approach minimizes unnecessary movement and ensures readiness for decisive action.
In the dynamic and unpredictable world of hunting, mastery of advanced techniques with rangefinders can be a game-changer. By embracing strategic stalking and dynamic distance assessment, hunters can optimize their hunting strategies and increase their chances of success in the field.
Whether planning meticulous stalks or maintaining situational awareness on the move, the versatility of rangefinders empowers hunters to navigate diverse hunting scenarios with confidence and precision. As hunters continue to explore the boundless possibilities of rangefinder application, the pursuit of the game becomes not just a challenge, but a deeply rewarding adventure fueled by innovation and expertise.
Do you have any tips for using rangefinders? Leave them in the comments below.